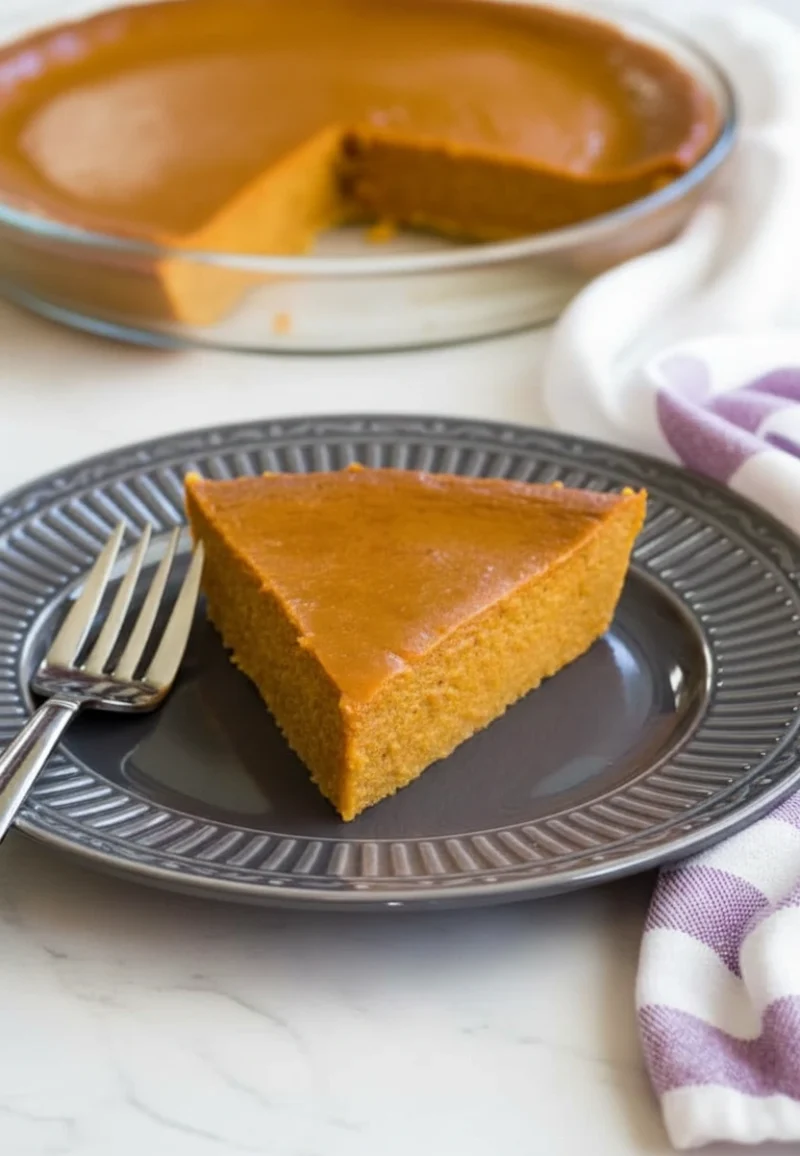
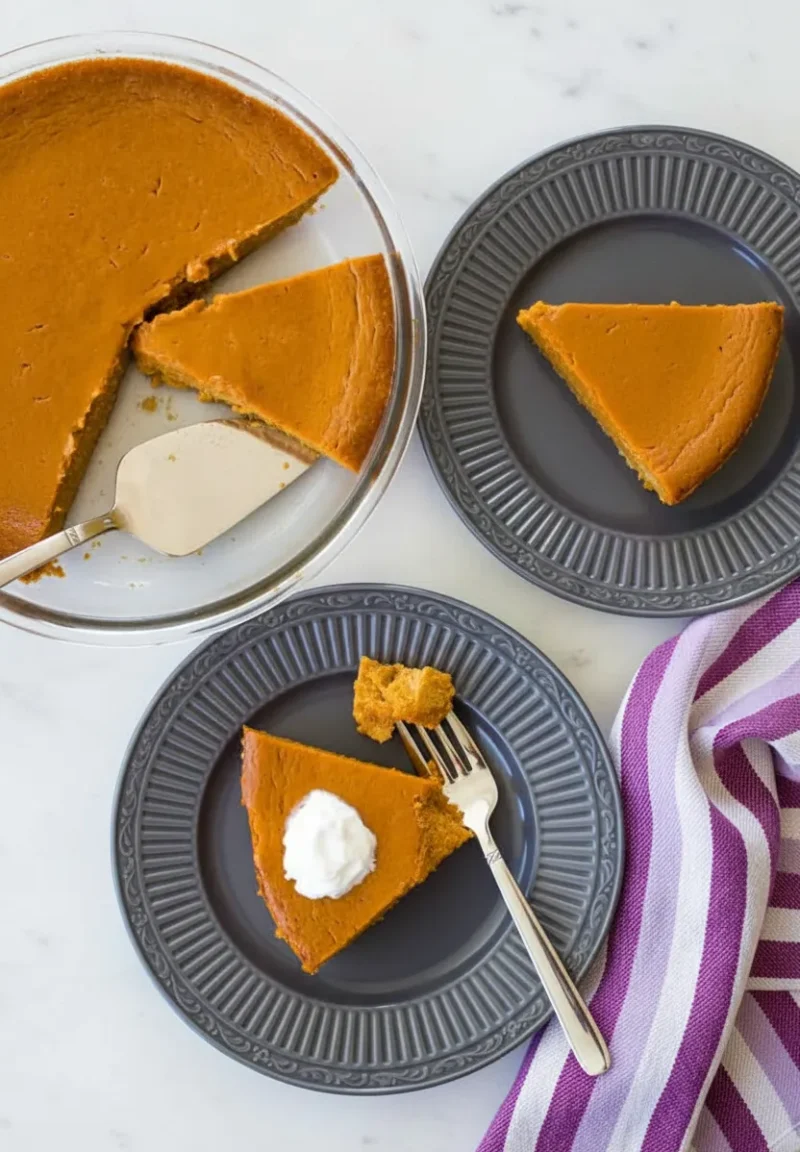
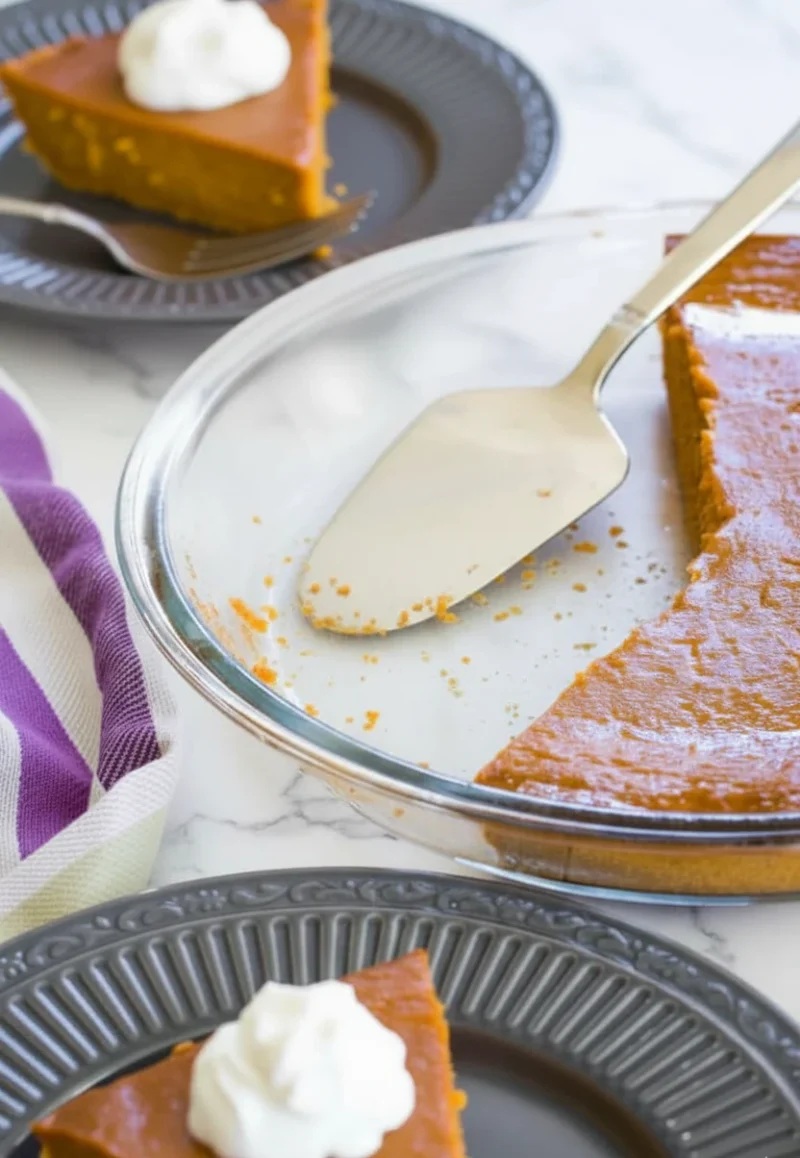
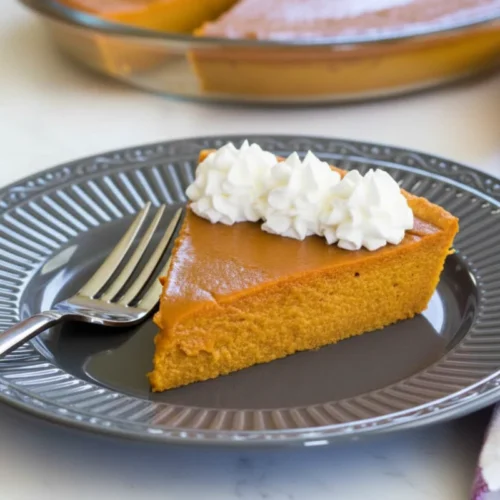
Crustless Pumpkin Pie
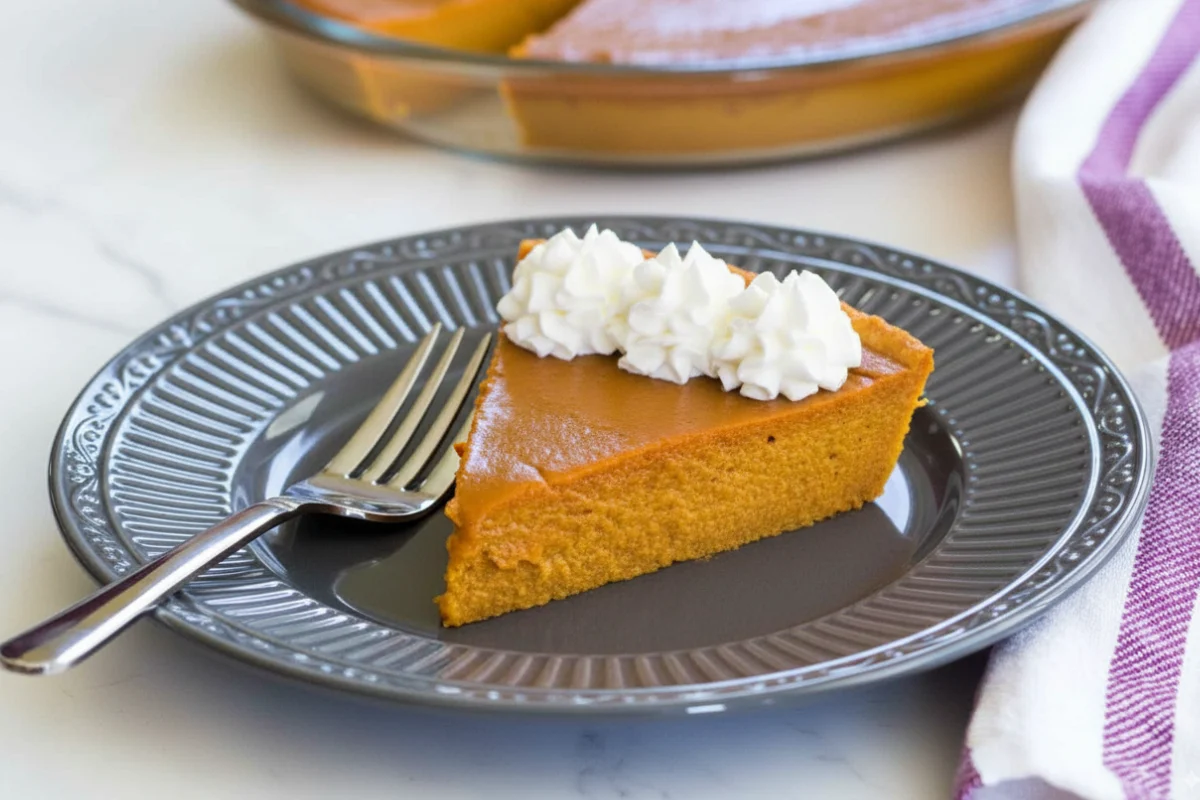
Let’s be honest, the best part of pumpkin pie is always the creamy, spiced filling, right? Well, this Crustless Pumpkin Pie recipe lets you get right to the good stuff! It gives you that delicious pumpkin custard you love, and it happens to be gluten-free without you even trying.
You only need a few simple things to make it, and it comes together in minutes. This is the perfect fuss-free dessert for fall and will quickly become a Thanksgiving favorite for your whole family.
Why You’ll LOVE this Pumpkin Pie
Oh my goodness, you are going to fall in love with how simple and delicious this pie is. Here’s why it’ll be your new favorite fall dessert:
- It’s Gluten-Free without trying: No weird flours or extra steps needed to make this a gluten-free treat.
- Super Easy to Make: Since you don’t have to mess with a crust, you can mix this up in just a few minutes.
- So Smooth and Creamy: The texture is just perfect. It’s a rich, smooth custard that melts in your mouth. YUM!
- All the Cozy Spices: It has that perfect warm and cozy pumpkin spice flavor that everyone loves.
- Uses Pantry Staples: You probably have most of the seven ingredients you need in your kitchen right now.
- It’s All About the Filling: This pie lets that delicious pumpkin flavor be the star of the show.
If you’re loving these cozy fall pies, you should also try this amazing Sweet Potato Pie. It’s another one of my favorites for the season!
Ingredients You’ll Need
You just need a handful of simple things to whip up this pie. Check the recipe card down below for the exact amounts you’ll need!
- Canned Pumpkin Puree: Make sure you grab the can that says “100% pure pumpkin,” not the pre-sweetened pie filling.
- Light Brown Sugar: I love using this for its warm, molasses flavor that goes so perfectly with pumpkin.
- Cornstarch: This is our little secret! It helps thicken the pie into a perfect custard without any flour.
- Pumpkin Pie Spice: This one-stop spice blend gives you all those classic, cozy fall flavors you’re looking for.
- Eggs: You’ll need these to create that rich, custard-like texture that makes the pie so good.
- Evaporated Milk: This makes the pie extra rich and creamy. Trust me, it makes a huge difference!
How to Make Crustless Pumpkin Pie
Ready to make this? It is SO EASY. You basically just mix everything in one bowl and bake it. Here’s how you do it:
Step 1: Preheat and Prep
First things first, get your oven preheating to 350°F. Go ahead and put your 9-inch pie plate on a baking sheet. This little trick makes it much easier to carry without spilling.
Step 2: Mix the Filling
In a big bowl, dump in your 1 can of pumpkin puree, 3/4 cup of packed light brown sugar, 1 tablespoon cornstarch, 1/2 teaspoon salt, 2 teaspoons pumpkin pie spice, and 3 large eggs. Whisk it all together until it’s completely smooth.
Step 3: Add the Milk
Now, gently pour in the 12 oz evaporated milk. I like to use a spatula to stir it in just until everything is mixed. Don’t go crazy mixing here, or you might get bubbles.
Step 4: Bake the Pie
Pour that beautiful filling into your pie plate. Now, let it bake for 45 to 55 minutes. You’ll know it’s ready when the center still has a little jiggle to it.
Step 5: Cool and Chill
Take your pie out of the oven and let it cool all the way down on your counter. Then, pop it in the fridge for at least 2 hours so it can chill nicely before serving.
Tips for the Best Crustless Pumpkin Pie
Want to make sure your pie comes out perfectly every single time? Here are a few of my favorite little tricks and tips.
- Mix Gently: Once you add the milk, stir it in softly. This helps keep the top of your pie from getting bubbles.
- Don’t Overbake: Seriously, take it out of the oven when it’s still a little wobbly in the middle. It firms up as it cools!
- Use Pure Pumpkin: Double-check your can to make sure it’s 100% pumpkin puree and not pumpkin pie filling.
- Chill it Good: For the cleanest slices, let the pie get really cold in the fridge for a couple of hours.
- Check Your Spices: Make sure your pumpkin pie spice is fresh! Old spices lose their yummy flavor.
- Use a Baking Sheet: This just makes your life easier and helps catch any drips, just in case.
Variations and Substitutions
This recipe is super fun to play with if you want to change things up. Here are a few ideas you can try out!
- Spice it Up: Feel free to add a little extra cinnamon or even a tiny pinch of ginger for a new flavor.
- Sweetener Swap: You could use maple syrup instead of brown sugar for a different kind of sweetness.
- Dairy-Free Option: Use a can of full-fat coconut milk instead of evaporated milk. It works great!
- Add an Extract: A little splash of vanilla extract always adds a nice touch of extra flavor.
- Individual Servings: Bake the filling in small ramekins for cute little personal pies! Just bake for a shorter time.
Make-Ahead and Storage Tips
This pie is perfect for making ahead of time, which is a lifesaver during the holidays! After your pie is baked and cooled, just cover it and keep it in the fridge. It will stay delicious for up to 4-5 days.
I usually make mine a day or two before Thanksgiving. Just a little tip: don’t freeze this pie, as the texture gets a little funny when it thaws.
Recipe FAQs
Can you overcook a crustless pumpkin pie?
You can. If you bake it for too long, it might get a crack on top, but it will still taste delicious!
How do I know when the pie is done?
It’s ready when the edges are set, but the very center still has a little wobble when you gently shake it.
Can I use a different type of sugar?
Sure! You could use dark brown sugar, but it will make the pie a little darker and change the flavor a bit.
Can I bake this filling in a crust?
Totally! This filling works great in a regular or gluten-free pie crust. You might need a deep-dish one to fit it all.
Why did my pie crack on top?
Cracks usually happen if the pie is in the oven for a little too long. Try checking it a few minutes earlier next time.
Can I make this dairy-free?
Yes! Just swap the evaporated milk for a non-dairy option like full-fat coconut milk. It works beautifully.
Does this pie need to be refrigerated?
Yes, it does. Since it’s made with eggs and milk, you need to keep it in the fridge to keep it safe to eat.
Can I use fresh pumpkin puree?
You can, but make sure it’s not too watery. The canned stuff usually has the perfect consistency for this pie.
Crustless Pumpkin Pie
Ingredients
- 1 can (15 oz) pumpkin puree
- 3/4 cup packed light brown sugar
- 1 tablespoon cornstarch
- 1/2 teaspoon kosher salt
- 2 teaspoons pumpkin pie spice
- 3 large eggs
- 12 oz evaporated milk
Instructions
- Preheat Oven: Get your oven warming up to 350°F and put your 9-inch pie plate on a baking sheet.
- Combine Ingredients: In a big bowl, whisk together the pumpkin puree, brown sugar,cornstarch, salt, pumpkin pie spice, and large eggs until it's nice and smooth.
- Add Milk: Gently stir in the evaporated milk with a spatula. Don't mix it too much!
- Fill and Bake: Pour your filling into the pie plate and bake for 45-55 minutes. Remember, you want a little jiggle in the center.
- Cool and Chill: Let the pie cool down completely, then put it in the fridge for at least 2 hr before you dig in. ENJOY!!!
Notes
- Remember to use 100% pure pumpkin, not the pre-mixed pumpkin pie filling from a can.
- Be gentle when you stir in the milk. This helps keep the top of your pie nice and smooth.
- Your pie will finish setting up as it cools, so don’t worry if it’s a little wobbly.
- Keep any leftovers covered in the fridge. They’ll be good for up to five days.
- Serve this pie chilled with a big spoonful of whipped cream. It’s the best way!