
Roasted Acorn Squash Soup

I’m obsessed with this roasted acorn squash soup! It’s sweet, creamy, and tastes like a warm hug on a cold day. You know what makes it special? Roasting the squash first gives it this amazing caramelized flavor that you just can’t get any other way.
My family asks for this soup all fall long. It looks fancy enough for Thanksgiving dinner, but it comes together so easily on a regular Tuesday night. Trust me, once you try roasted acorn squash soup, you’ll want it in your regular rotation.
Why You’ll LOVE this Acorn Squash Soup
Here’s why this soup is going to become your new fall favorite, I promise!
- Caramelized sweetness: The oven works its magic on the squash and creates these deep, sweet flavors you’ll crave all season.
- Velvety texture: After blending, it gets SO silky smooth that each spoonful feels like pure comfort in your mouth.
- Perfectly balanced: Sweet maple vibes meet savory onions and garlic – it’s like a flavor party in every bowl!
- Crowd-pleaser: Your guests will think you slaved away, but honestly? This soup is easier than ordering takeout, yum!
- Nutritious comfort: You get tons of vitamins and fiber, so you can feel good about having seconds (or thirds).

Ingredients You’ll Need
Grab these simple ingredients to make your roasted acorn squash soup happen – I’ve listed the exact amounts down in the recipe card!
- Acorn Squash: Look for ones that feel heavy and have smooth skin. Heavy squash means more flesh inside, and that’s what we want!
- Olive Oil: I use this for roasting the squash and cooking the veggies.
- Onion: This adds a sweet, savory base. Every good soup starts with onions, and this one’s no different!
- Carrots: They bring natural sweetness plus that pretty orange color.
- Garlic: Fresh cloves give you that punchy, savory flavor.
- Chicken Broth: This is your liquid base. It brings everything together and makes it actually taste like soup instead of mush!
- Fresh Thyme: This herb smells amazing and tastes earthy.
- Half and Half: Want that creamy, dreamy texture? This is how you get it. The soup goes from good to restaurant-quality with this addition.
- Maple Syrup: You can skip this if you want! I like adding just a bit because it makes the squash taste even sweeter and more fall-like.
- Black Pepper: Just a little bit adds some warmth. It keeps the soup from being too sweet and one-dimensional in flavor.
How to Make Roasted Acorn Squash Soup
Making this soup is easier than you think! Just follow these steps, and you’ll have the creamiest, most delicious bowl ready to go.
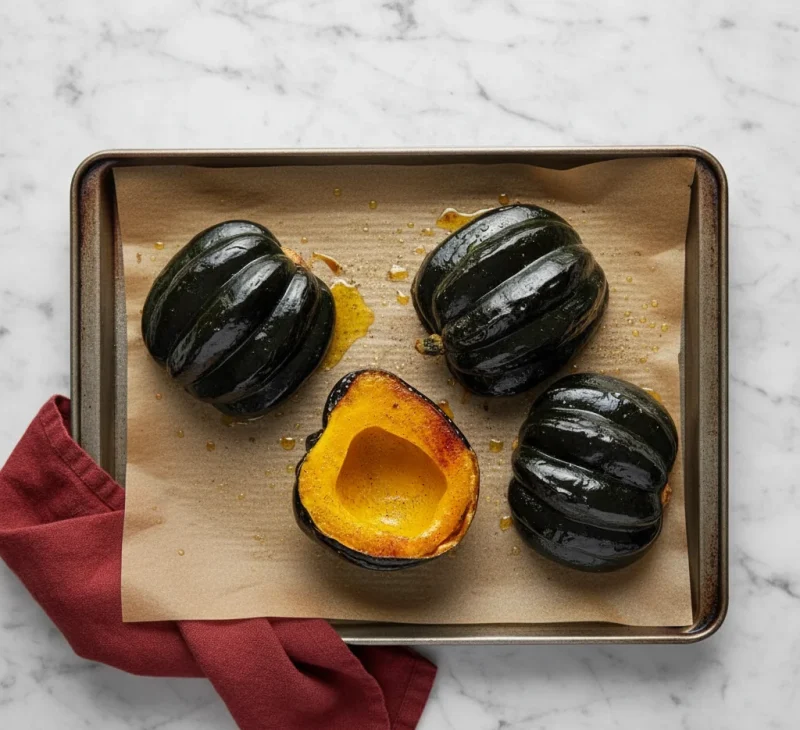
Step 1: Prepare and Season the Squash
Turn your oven to 425°F (218°C) and cut your squash in half. Put them cut-side up on a baking sheet with parchment paper. Drizzle 2 tablespoons olive oil over them, then add ½ teaspoon salt and ⅛ teaspoon black pepper.
Step 2: Roast Until Tender
Flip those squash halves over so the cut side faces down. Roast them for 30-40 minutes – you want them super soft when you poke them with a fork. They’re done when the skin looks a bit wrinkled.
Step 3: Sauté the Aromatics
While your squash is roasting, heat 1 tablespoon olive oil in your Dutch oven on medium heat. Toss in 1 chopped onion, 2 chopped carrots, and 3 minced garlic cloves. Cook for 5 minutes until they smell amazing and start browning.
Step 4: Add Squash and Broth
Take a spoon and scoop all that roasted squash flesh out of the skin. Throw the skin away – you don’t need it! Add the squash to your pot with 4 cups chicken broth and 1 tablespoon fresh thyme leaves. Give it a good stir.
Step 5: Simmer the Soup
Crank the heat up to high and let it boil. Then turn it down to medium-low, pop the lid on, and let everything simmer for 10 minutes. This is when all those flavors start getting really friendly with each other!
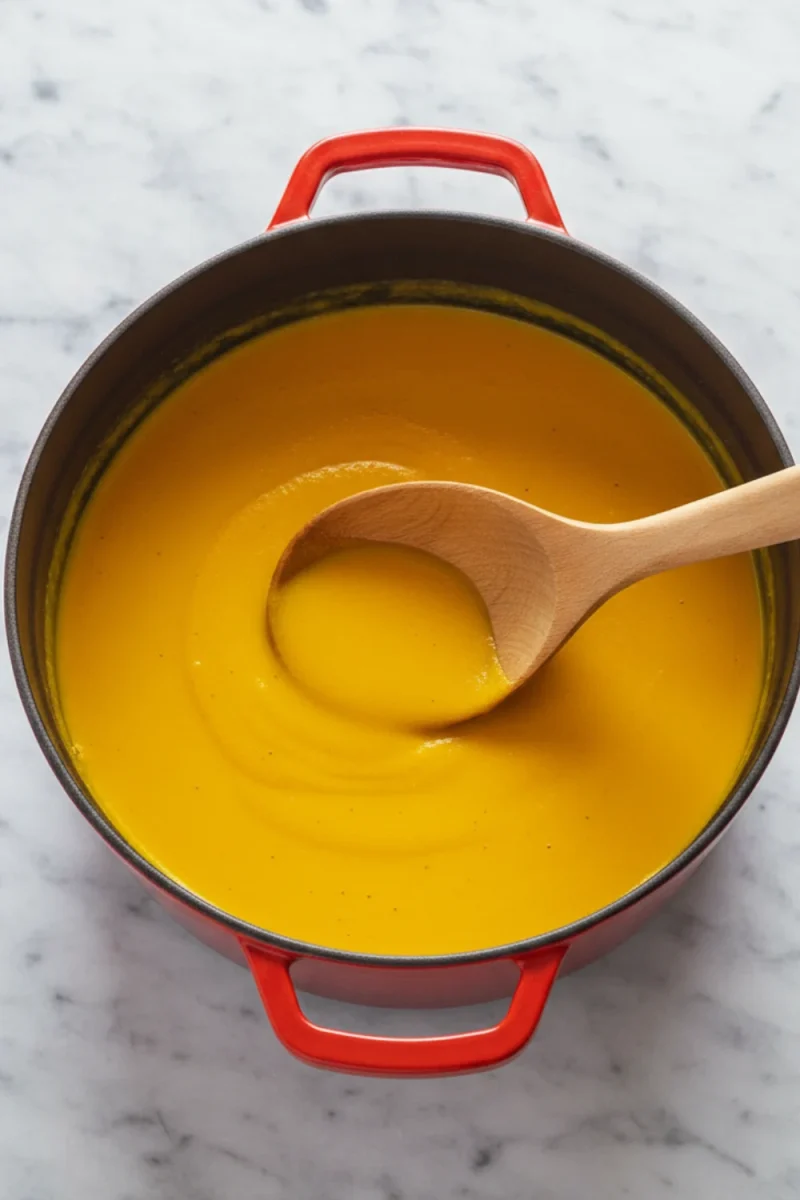
Step 6: Blend to Silky Perfection
Pour in ½ cup half and half. Grab your immersion blender and blend everything until it’s completely smooth. Season with 1½ teaspoons salt and ¼ teaspoon pepper. Want it sweeter? Blend in 1-2 tablespoons maple syrup and taste as you go.
Tips for the Best Acorn Squash Soup
Want your soup to turn out AMAZING every single time? Here’s what I’ve learned from making this over and over.
- Roast until extra soft: Let your squash get really, really tender. It should be almost falling apart when you touch it – that’s the secret to creamy soup!
- Choose similar-sized squash: Pick squash that are about the same size so they finish roasting at the same time. Nobody wants half-done squash, right?
- Avoid the skin completely: When you scoop out the flesh, check for any bits of skin that might be sticking. They’ll ruin your smooth texture if they sneak in.
- Adjust consistency as needed: Too thick? Just splash in more broth, a little at a time. You can always add more, but you can’t take it back out!
- Vent your blender lid: Using a regular blender instead of an immersion one? Take that center cap off the li,d or you’ll have hot soup exploding everywhere.

Variations and Substitutions
Want to switch things up a bit? Here are some fun ways to make this soup your own!
- Make it vegetarian: Swap the chicken broth for veggie broth and boom – you’ve got a vegetarian soup that tastes just as good!
- Try different sweeteners: Don’t have maple syrup? Use honey or brown sugar instead. Or skip the sweetener completely if you prefer less sweet soup.
- Add warming spices: Throw in some curry powder, cinnamon, nutmeg, or ginger. These spices make your kitchen smell incredible and add so much depth!
- Use different cream: Heavy cream makes it super rich, coconut cream works for dairy-free, or use almond milk if you want something lighter.
- Switch up aromatics: Try adding celery, shallots, fennel, or fresh ginger. They all play really nicely with the sweet squash flavor!
Make-Ahead and Storage Tips
This soup actually tastes better the next day because all those flavors keep hanging out together! Let your soup cool down, then put it in containers with tight lids. It’ll stay good in your fridge for 3-4 days.
Want to prep ahead? Roast your squash and scoop out all the flesh, then stick it in the fridge until you’re ready to make soup. This cuts your cooking time way down when you’re in a rush!
You can freeze this soup for up to 3 months in freezer-safe containers or those handy soup cubes. When you’re ready to eat it, just warm it up on the stove or pop it in the microwave. Easy!

Recipe FAQs
Can I make this soup without roasting the squash?
Yep! Peel and chop the squash into cubes, then cook it right in the soup for 20-30 minutes until it’s super soft and ready to blend.
Can I make this soup dairy-free?
For sure! Just use coconut cream, almond milk, or cashew cream instead of the half-and-half. It’ll still taste creamy and delicious, I promise.
What if I don’t have an immersion blender?
No worries – use your regular blender! You might need to blend it in two batches. Just remember to take off that center lid cap first.
How can I make the soup thicker?
Use less broth when you’re making it, or let it simmer without the lid on for a while. You can also blend in more roasted squash!
Can I freeze acorn squash soup?
Yes! Put it in containers or soup cubes and freeze for up to 3 months. Let it thaw in your fridge overnight, then warm it up when you want some.
What to serve with acorn squash soup?
I love serving it with crusty bread for dipping. It also goes great with kale salad, roasted chicken, stuffed acorn squash, or roasted Brussels sprouts.
Roasted Acorn Squash Soup
Ingredients
Method
- Prepare the squash for roasting: Turn your oven to 425°F (218°C) and put your halved acorn squash cut-side up on a baking sheet lined with parchment paper. Drizzle 2 tablespoons olive oil over them, then sprinkle ½ teaspoon salt and ⅛ teaspoon pepper on top.
- Roast the squash until tender: Flip those squash halves over so the cut side faces down on your baking sheet. Roast for 30-40 minutes until they're super soft when you poke them with a fork. The skin should look a bit wrinkled when they're ready!
- Sauté aromatic vegetables: While your squash is roasting away, heat 1 tablespoon olive oil in your Dutch oven on medium heat. Add 1 chopped onion, 2 chopped carrots, and 3 minced garlic cloves. Cook them for 5 minutes until they smell amazing and start turning brown.
- Combine squash with broth: Grab a spoon and scoop out all that roasted squash flesh, then toss the skin in the trash. Add the squash pieces to your pot along with 4 cups chicken broth and 1 tablespoon fresh thyme leaves. Give everything a good stir!
- Simmer soup to develop flavors: Turn the heat up to high and let everything come to a boil. Then turn it down to medium-low, put the lid on your pot, and let it simmer for 10 minutes so all those flavors get to know each other.
- Blend to creamy perfection: Pour ½ cup half and half into the pot, then grab your immersion blender and blend until it's totally smooth and creamy. Add 1½ teaspoons salt and ¼ teaspoon pepper to taste. Want it sweeter? Blend in 1-2 tablespoons maple syrup until it tastes just right!
Notes
- Roast your acorn squash until it’s extra tender with wrinkled skin. This makes scooping out the flesh super easy and helps your soup blend up perfectly smooth!
- If your squash isn’t done roasting when the veggies finish cooking, just add a splash of broth and take the pot off the heat so nothing burns.
- Check really carefully when you scoop out the squash flesh. Any bits of skin that sneak in will mess up that smooth, creamy texture you’re going for!
- Your soup looking too thick? Add broth in small splashes – about ¼ to ½ cup at a time. Blend after each addition until it’s just right.
- Keep leftover soup in a container with a lid in your fridge for up to 3-4 days. You can also freeze it for up to 3 months!